protractors for wipers
>description
>angle measurement
>to change batteries
>calibration / sign change
>angle gauge
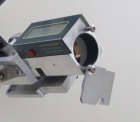
Twisting angle measurement device for 04090-A / 0939x-A / 0931x-A
COMMON CHARACTERISTICS THREE MODELS
- Measures angle between wiper arm and windshield.
- Stand alone device.
- No need to zero search : direct display of value at power on.
- Angle values between -15° and +15°.
- Display by step of 0.05°.
- Maximum error 0.3°.
- Supply : two button batteries 3V 560 mA-h type 2450.
- Duration of use without changing batteries: 370 hours
- Weight 200 to 300 grams depending on model.
The three models are different by the measurement taking. The 04090-A model is a measuring and displaying device without measurement taking module. The 0939x-A models have a measurement taking module with a clip. The 0931x-A have a measurement taking module with a spring holder.
Angle measurement
Push on ON/OFF button and release. The actual value is displayed by steps of 0.05° with sign. To stop push on ON/OFF. The device turns off after 5 minutes of inactivity.
Push on ON/OFF button and release. The actual value is displayed by steps of 0.05° with sign. To stop push on ON/OFF. The device turns off after 5 minutes of inactivity.

To change batteries
Unscrew the screws of the rear plate without removing they completely.
Free the rear plate and revolve it.
Change the batteries (+ pole inside of the device).
Replace the rear plate and rescrew.
Unscrew the screws of the rear plate without removing they completely.
Free the rear plate and revolve it.
Change the batteries (+ pole inside of the device).
Replace the rear plate and rescrew.
calibration, sign change
To start calibration, device in state off, push on button ON/OFF continuously. After approximatively ten seconds the indications F1, F2, F3, F4, F5 will follow each other.
F1 is the routine that enables to fix the zero value.
F2 enables to change the sign.
F3 displays the binary value of the angle.
F4 reserved to the metrology service, accessible after introduction of the access code.
F5 no function ; end of calibration.
To choose a routine release the ON/OFF button when the indications F1 to F5 follow each other.
F1 : when the button ON/OFF is released the display is flashing. Set the device in position 0°. Push on ON/OFF until 0.00 steady appears. Release the button, routine is ended.
F2 : when the button ON/OFF is released the message SES and the sign appear. On each brief pressure the sign changes. A long pressure records the sign and gives the message on .When the button is released the device goes off.
F3 : when the button ON/OFF is released the binary value of the angle is displayed. A brief pressure and the device goes off.
F4 : when the button ON/OFF is released the device displays 000. The 0 on the right is flashing. Brief pressures enable to change the right digit value : 1,2,3,… A long pressure records this digit and shifts it to center. Repeat operation for second and third digit of acces code. A long pressure after the third digit enables to go to the calibration routine for values of +15°, +7.5°, 0°, -7.5°, -15°. If access code is false device goes off. If access code is correct the device displays on. A brief pressure starts the routine. Set the device in a position corresponding to one of angles of calibration : +15°, +7.5°…..The device gives the angle value flashing. A long pressure will fit this value to the calibration value. Example : The device set in position +15°, the read value 14.60° (flashing) will change to +15.00° (steady). All intermediate values will be calculated with calibration values. A long pressure turns off the device.
F5 : this function is reserved for future developpements

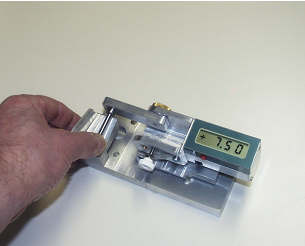
Angle gage
The angle gauge enables to quickly verify if the indications given by the device are in the range of admitted precision. The calibration piece is mounted on the reference ring with a low pressure and the shaft applied to the differents planes of the gauge. The gauge angles are –15°, -7.5°, 0°, +7.5°, +15°. The device must indicate the angle value at +/- admitted error. The gauge can be used to calibrate the device with a precision of +/- 0.1°
The angle gauge enables to quickly verify if the indications given by the device are in the range of admitted precision. The calibration piece is mounted on the reference ring with a low pressure and the shaft applied to the differents planes of the gauge. The gauge angles are –15°, -7.5°, 0°, +7.5°, +15°. The device must indicate the angle value at +/- admitted error. The gauge can be used to calibrate the device with a precision of +/- 0.1°
Posted by J. D'hoedt, on Wednesday, February 18th 2009 at 18:18


