dynamometer for wiper arms
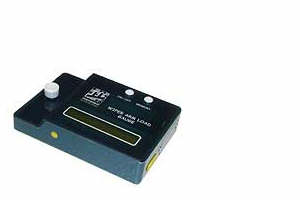
wiper arm load gauge 00403-M
>description
>load measurement
>changing the battery
>unit choice
>language choice

Description
- Micro-controller and strain gauge system.
- Automatic temperature compensation.
- Measure the load up to 20 N.
- Three units displayed: kgf , N, oz.
- precision: 1% full scale.
- LCD 16 characters.
- Automatic zero search on starting up
- Memorization of the displayed value
- 9 V PP3 battery feeding.
- Measurement by impulses.
- Display refresh: one time per second.
- Languages: French, English, Spanish, German, Italian.
- Dimensions: 80 x 120x 31 mm
________________________________________________________________________________
Load measurement
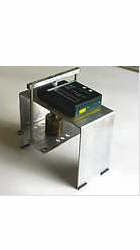
Put down the device on the windshield in such a way that the extremity of the wiper arm arrives in front of the measure system.
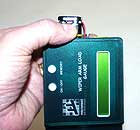
Push and release the ON / OFF button without applied effort.
Wait for the ZERO SEARCH:OK indication.
Apply the extremity of the wiper arm on the measurement system; the display indicates the value and the load unit.
When the measure is steady, push on MEMORY button to maintain the display to this value. Clear this value by pushing once again.
The device cuts itself automatically after three minutes of inactivity.

Changing the battery
Unscrew and remove the closing plate.
Disconnect battery connector.
Take the battery out, change it.
Engage the battery ( minus pole to the center ). Set the battery connector.
Take the battery in, replace the closing plate and screw back again.
Unscrew and remove the closing plate.
Disconnect battery connector.
Take the battery out, change it.
Engage the battery ( minus pole to the center ). Set the battery connector.
Take the battery in, replace the closing plate and screw back again.

Load calibration
To start the procedure, hold MEMORY down. Push and release ON/OFF. Wait until OK appears. Release MEMORY.
If the difference between measured value and real value is not important you may use a short calibration procedure. At starting up apply a known charge and verify the indication given by the device. Correct with the gain adjust potentiometer to obtain the exact value and turn the device off. Repeat operation to check.
Complete calibration:
- for a charge of 0 of the displayed value is approximately 35.
- for a charge of 1 kgf the displayed value must be: the given value for 0 kgf plus 450, for example 35 + 450 = 485. Adjust the gain potentiometer to perform the condition: displayed value at 0 kgf + 450 = displayed value at 1 kgf.
- Redo with 0 kgf and 1 kgf to check the condition. If not, adjust once again.
To quit push on ON/OFF. To go to UNIT CHOICE push on MEMORY
Unit choice
This procedure follows load calibration.
To go from an unit to the next push on MEMORY. To choose the unit hold MEMORY down until OK appears. To quit push on ON/OFF. To go to language choice push on MEMORY.
This procedure follows load calibration.
To go from an unit to the next push on MEMORY. To choose the unit hold MEMORY down until OK appears. To quit push on ON/OFF. To go to language choice push on MEMORY.
Language choice
This procedure follows UNIT CHOICE.
To go from an language to the next push on MEMORY. To choose the language hold MEMORY down until OK appears. To quit push on ON/OFF.
This procedure follows UNIT CHOICE.
To go from an language to the next push on MEMORY. To choose the language hold MEMORY down until OK appears. To quit push on ON/OFF.
Posted by J D'hoedt, on Thursday, February 19th 2009 at 10:51


